| In newer versions of the app (6.5+), you can use custom clockfaces’ packs without having to install or create plugins. See Using your own analog clockfaces’ pack for details. If you want to create or edit your own texture for the clockface read this page up to the “Building the application” section. |
This guide is not only for programmers, designers but also for people who wants to make their own applications and earn money from them. After reading you will be able to made new clockfaces even if you had no programming knowledges (you must have some knowledges in Adobe Photoshop). I give you a unique chance – create your unique clocks as application-plugin.
This work required:
- Download and install Android Studio – for building your application-plugin
- Adobe Photoshop – for creating textures and layout of clockface
- Download a demo-project of plugin from this link. It is relevant also for developers of plugins for Battery Saving Digital Clocks.
- Download sample of a clockface from link made in Photoshop.
Creating the clockface texture
Let’s start with the creation of the clockface. Download the example of a clockface made in Photoshop (link above). I’m recommend to make one texture 1024×1024 pixels, but there may be other dimensions also which are the multiple of a power of 2 (256×256, 512×512, 2048×2048 for example). Clocks are making with transparent background and after they are saved as a png file it can be used later for getting the transparency mask, this process is described below. For convenience, this project has drawn lines for positioning arrows and the clockface.
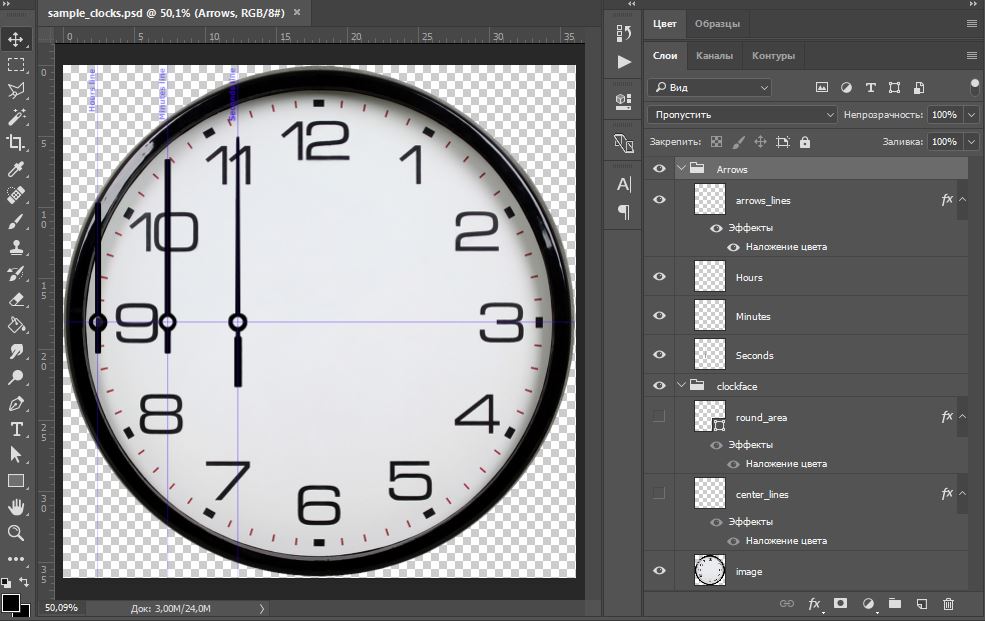
Clockface project example
Additional preparing of the clockface
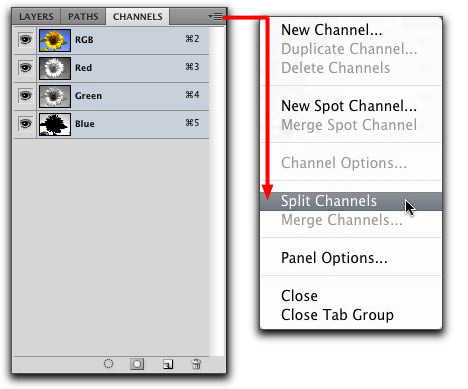
To reduce the size of clockface I use 2 jpg files instead of one png, first is the texture and second – transparency mask. To make the mask file from png you need to open it in Photoshop, go to «Layers» >«Channels», press on the drop down menu button and select «Split channels».
Last of the opened files which name includes “transparency” you need to save as jpg with the same name as png file with «_mask» addition. Other files should be closed without saving.
To ensure that the edges of the elements in the main jpg file are not of a different color than each of the elements I usually add a suitable background to each element or: don’t close these files, create a new file with clockface’s dimensions, open tab “Channels”, consequentially select and copy content of each one and paste this as layers contents into this new file.
Save arrows as png.

Example of the saved clockface folder
Building the application
Clockface is completed, you need only to build the application from it. Extract the previously downloaded demo-plugin project, go to app\src folder and duplicate analogWhite.
Rename it to your name without spaces, newAnalogClocksPlugin for example, go into it and into assets\textures\packs and insert the previously prepared folder.
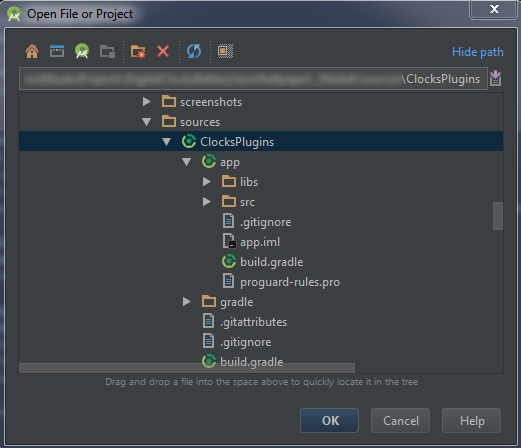
Open previously downloaded and installed Android Studio, go to File > Open… and choose the project folder.
Open project file build.gradle (Module:app), duplicate analogWhite {…} with the braces content and insert after it. Rename analogWhite to newAnalogClocksPlugin which same as our folder name – this is a plugin project variant.
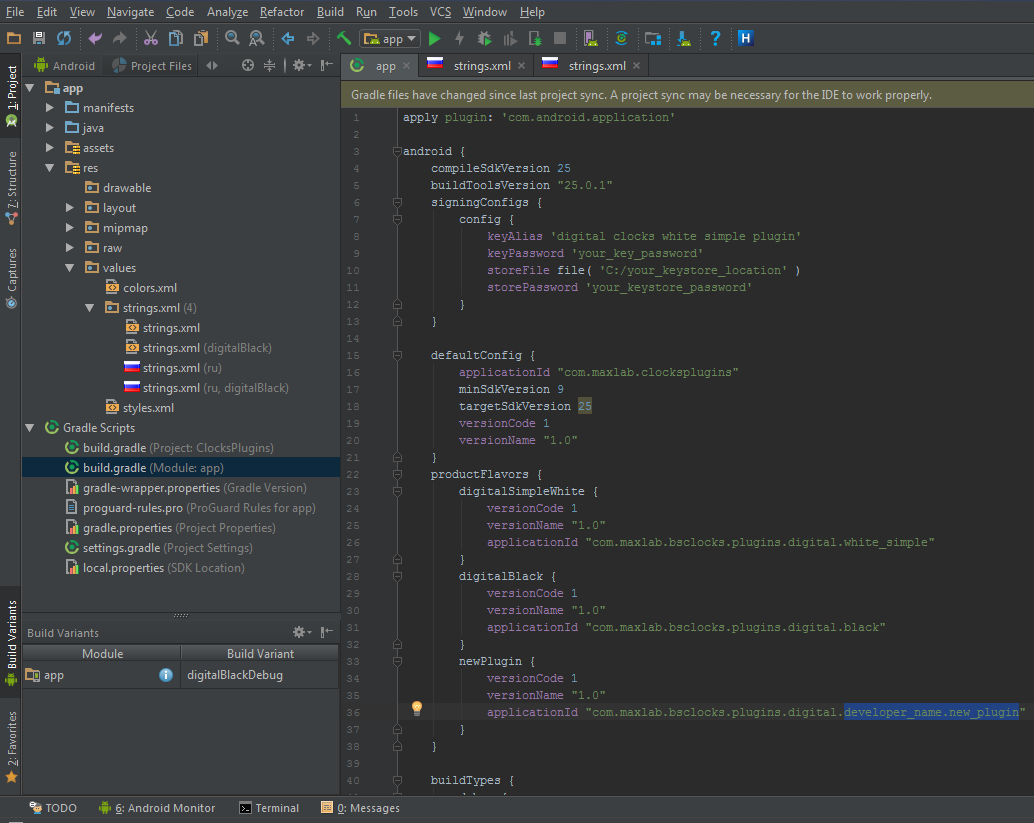
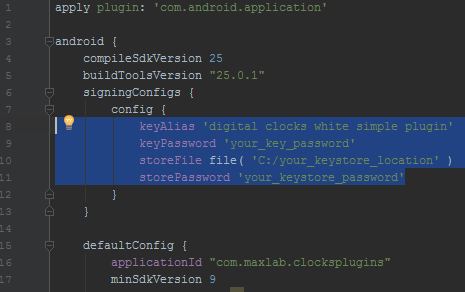
Leave applicationId com.maxlab.bsclocks.plugins. analog. and add your own. I recommend the view of “developer_name.plugin_name” as in the picture above to make your id different to others.
Fill data of signing information. If you had no key stores you should create it and create your key also for digital signing your clockface application. Read more from the official website https://developer.android.com/studio/publish/app-signing.html. For easy starting and debugging add a string android.productFlavors. newAnalogClocksPlugin.signingConfig signingConfigs.debug (only for debugging, use your own signing config in the release version!) before lintOptions.
Duplicate the line for signing the new plugin and replace analogWhite to newAnalogClocksPlugin:

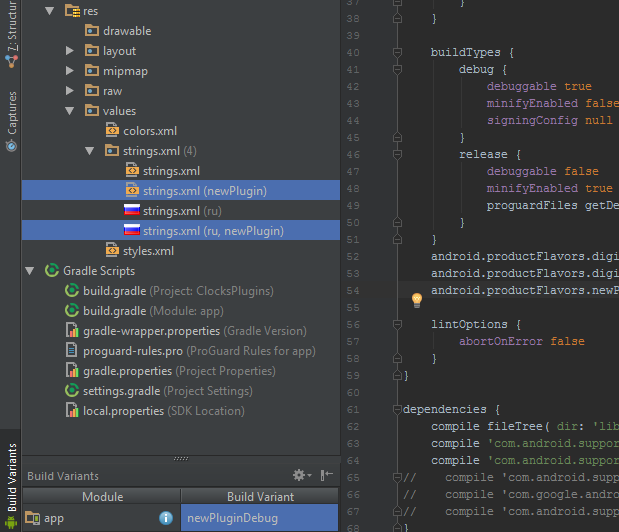
Select newAnalogClocksPluginDebug or newAnalogClocksPluginRelease from BuildVariants as in the picture below. Now open files strings.xml for different languages (selected in the picture). You can add your own locales.
You should change few parameters – the app_name and clockface name inside the main application. By the way there can be several clockfaces, you need to specify own name and parameters for everyone (see below).
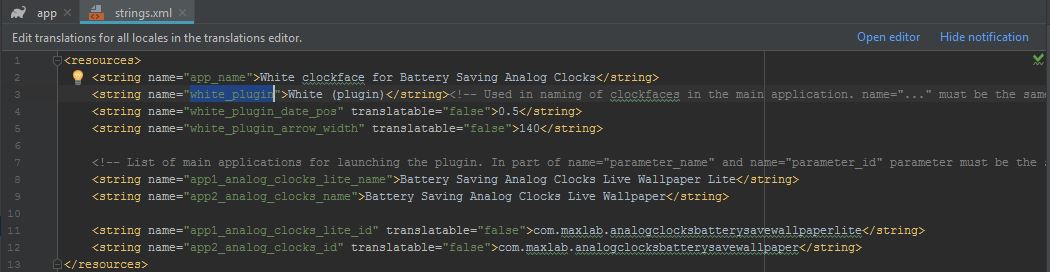
Rename white_plugin (quotes content) to your clockface name which is the same as folder name and write an adequate name content which will be visible in clockfaces choosing in the main clocks application.
In the next lines you should change only white_plugin and leave the ending, _date_pos or _arrow_width. The value of _date_pos sets the circle radius which will contain the date (if it is activated in the main app) regarding the radius of the whole clockface, i.e. value of “1” equals to the whole clockface’s radius, “0.5” – half of the clockface and so on. I recommend to use value before 0.5 to keep the date not climbing on the numbers inside the dial (experimenting with this value if you have the full version of the main application). The value of a parameter which contains _arrow_width is equal to the width of an arrow in pixels (140) with clockface’s dimension 1024×1024. For convenience, this project has drawn vertical supporting lines, corresponding to this value. Change them to your own if you will draw arrows with greater width.
Do the same with localized strings.xml (only for translatable strings).
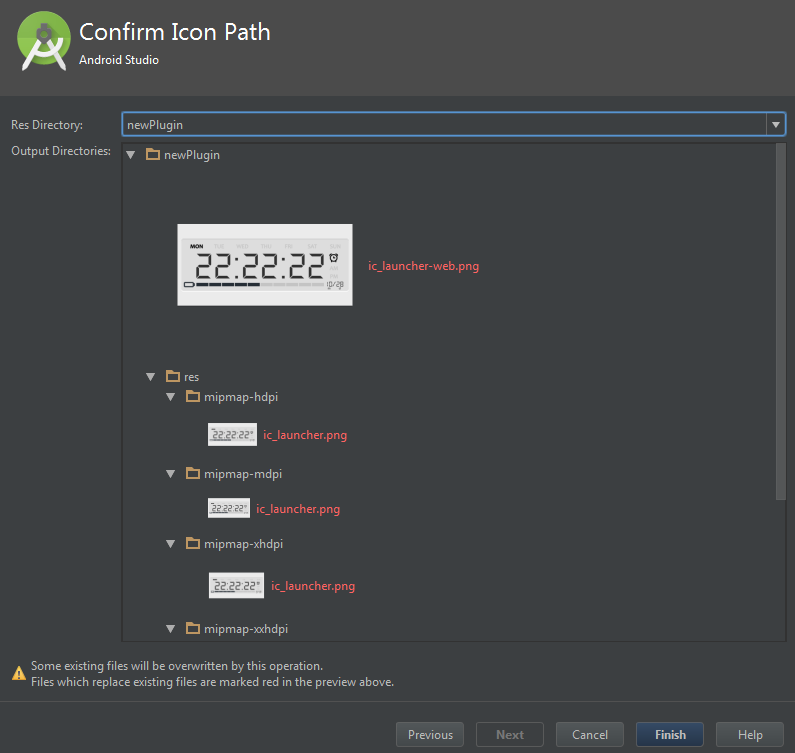
At last you need to prepare the icon for the application. To made this easy you should go to res\mipmap, press right mouse button and in the drop-down menu choose New > Image Asset.

Choose «Image» and image path, Shape – «None».
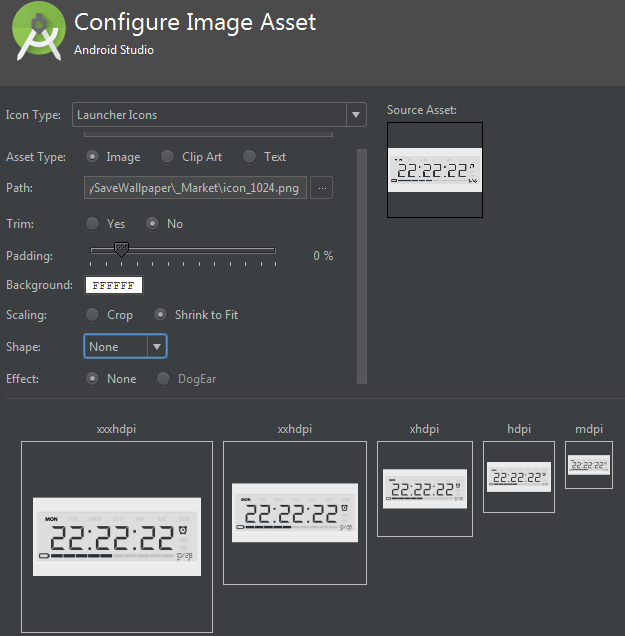
Specify the folder with the resources of the plugin. Choose newAnalogClocksPlugin and press Finish.
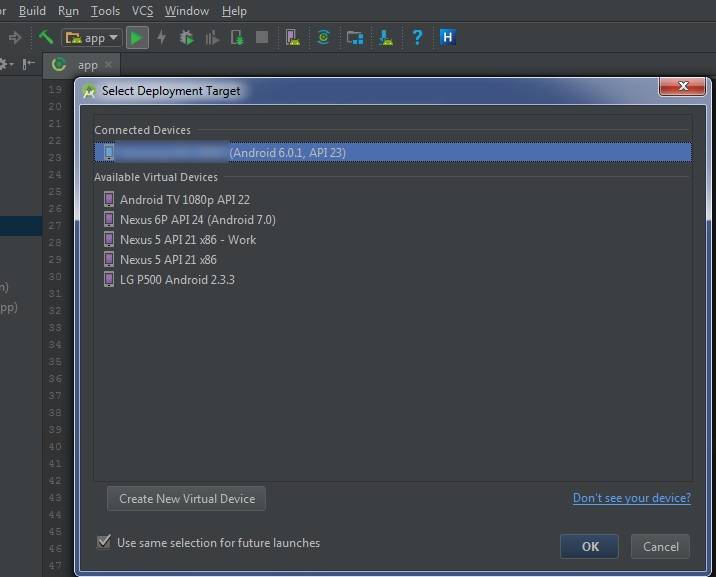
Project is ready. Be sure to check it on a real device or emulator. The application of the Battery Saving Analog Clocks must be installed on the device. Connect the device to the computer via USB.
The necessary drivers must be installed on the computer and debugging mode must be enabled on the device. You can enable USB debugging on Android by going to Settings> Applications> Development> USB Debugging (set checkbox). On Android 4.2 and greater the debugging mode can be enabled in a different way: go to Settings > About device and tap to “Build number“ 7 times.
Press the green triangle button «Run», choose or create new device and press OK.
The plugin window must be launched.

Click on installed application. On the most of devices the clockface will be opened immediately, on other devices you should run the main application by yourself by going to the live wallpaper chooser, application, its settings, clocks type and choose your clockface.
If the all looks like what you wanted then finally go to Build > Generate signed APK and publish your application on Google Play!
All questions send me on maxlab.code@gmail.com with the “Plugin development” topic.